Using the Org Chart
How to build a great Org Chart in Ninety. Add people to seats and insert their roles and responsibilities.
-
 Insights
-
 Data
Data
-
 Rocks
Rocks
-
 To-Dos
-
 Issues
-
 Meetings
-
 Headlines
-
 Vision
-
 Org Chart
-
 1-on-1
-
 Process
-
 Directory
-
Knowledge Portal
-
 Mastery
-
 Assessments
-
Partner Hub
-
 Integrations and Beta
-
 Account Options and Troubleshooting
-
Mobile (Beta)
Table of Contents
Overview
The Org Chart tool documents the structure of your departments and teams. Learn more about how this tool benefits your company by reading our Introduction to Data article. The video below covers the basic features of the tool to help you get started, including:
- Main objectives
- User permissions
- Editing the chart
- Adding Seats
- Assigning users
- Moving Seats
- Editing Seats
Default Org Chart
The Org Chart comes with five pre-filled Seats — Visionary, Operator, Sales/Marketing, Operations, and Finance. These Seats are completely customizable, so feel free to adapt them to your company's needs.
The Org Chart can only be edited by Owners, Admins, Managers, and Coaches.
Using the Org Chart
Users with Manager or higher permissions can edit and organize your company's Org Charts. The first step to take with the Org Chart is to organize the Seats into departments and teams that make sense for your . Once the chart is organized, Seats can be edited as needed to add roles or update details. Learn more from the tabs below.
Editing & Customizing Seats
To edit or customize a Seat on your Org Chart:
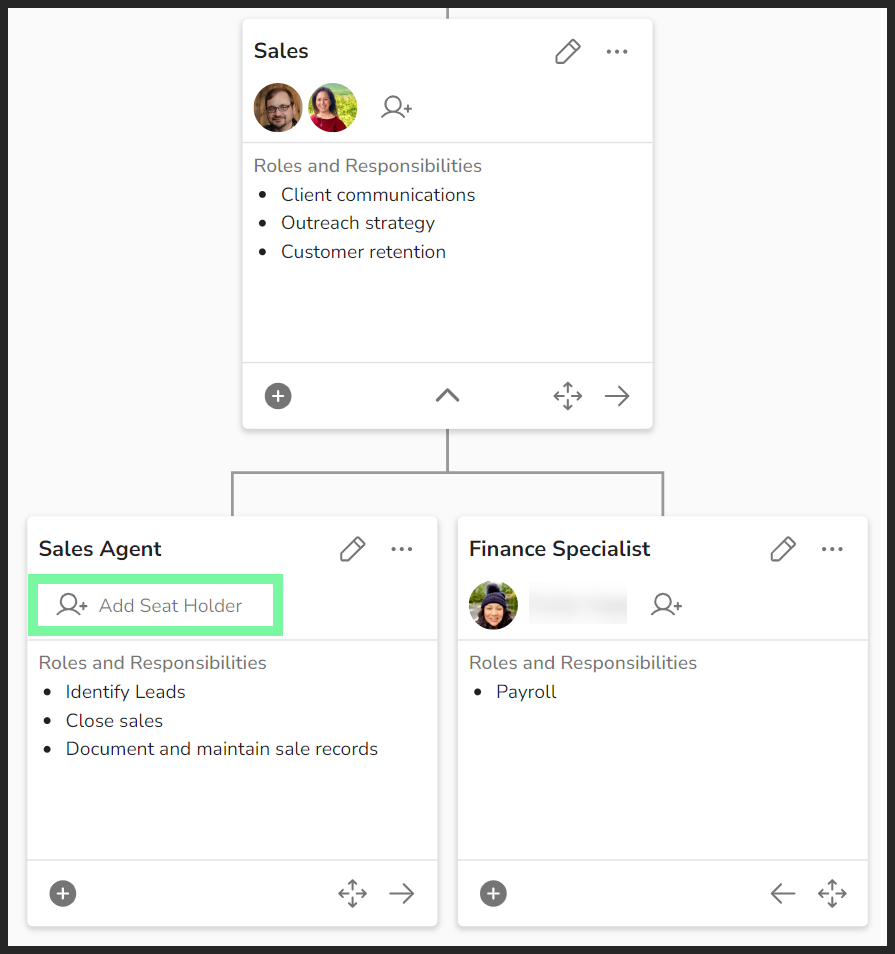
- Click the profile icon to change who is assigned to the Seat.
- Click the pencil icon to open the Seat's details card.
- Click the Save button after making any changes to a Seat.

From the details card you can:
- Select who the Seat reports to
- Change the Seat's name
- Add other users to the Seat
- Write new roles and responsibilities
- Drag and drop roles and responsibilities
- Attach documents
You can have more than one individual in a Seat. Learn more here.
Creating Seats
To add a new Seat to your primary chart:
- Click Org Chart from the left navigation.
- Click Edit Chart.
- Click the plus icon under the card you wish for the new Seat to report to.
- Complete the information and then click Create.
- Assign someone to the new Seat by clicking the profile icon.

To add a new Seat to one of your draft charts:
- Click Org Chart from the left navigation.
- Click the Drafts tab at the top left of the page.
- Click the desired chart or click Create new to start a new draft.
- Click the plus icon under the card you wish for the new Seat to report to.
- Complete the information and then click Create.
- Assign someone to the new Seat by clicking the profile icon.
Assigning Users
To assign a user from your Directory to a Seat:
- Click Org Chart from the left navigation.
- Click Edit Chart at the top right of the page.
- Click the person-plus icon on the Seat's card.
- To find the Seat you're assigning someone to, you may need to click the down arrows to expand departments/teams.
- Click the user's name from the popup.
Changes are saved automatically.
Locating Seats
After navigating to the Org Chart tool, you can quickly find a person or Seat by writing the name of a team member or Seat in the search bar and then clicking on the relevant return.
Cloning Seats
You can clone an existing Seat to copy over the same title, roles, responsibilities, and attachments to a new Seat.
To clone an existing Seat:
- Click Org Chart from the left navigation.
- Click Edit Chart at the top right of the page.
- Click the ellipses at the top right of the Seat's card.
- Click Clone Seat from the popup.
This process does not clone any Seats under the cloned Seat.
Rearranging Seats
You can rearrange the Seats on the Org Chart using arrows to slide the cards left or right or by moving a Seat under a new manager/parent Seat. Changes are saved automatically.
To move a Seat left or right on the Org Chart:
- Click Org Chart from the left navigation.
- Click Edit Chart at the top right of the page.
- Click the left or right arrows to move the Seat's card to the preferred location.
To move a Seat under a different Seat:
- Click Org Chart from the left navigation.
- Click Edit Chart at the top right of the page.
- Click the four-directional arrows icon.
- Click the new Manager Seat from the dropdown.
- Click Save.
Deleting Seats
To delete a Seat card from your Org Chart:
- Click Org Chart from the left navigation.
- Click Edit Chart at the top right of the page.
- Click the ellipses at the top right of the Seat's card.
- To find the Seat you're looking for, you may need to click the down arrows to expand departments/teams.
- Click Delete Seat from the popup.
If you delete a Seat that has Seats that report to it, those Seats will also be deleted.
Printing the Org Chart
- Click the PDF icon on the top right of the screen.
- Choose your Print Type.
- Multi-Page
- Single-Page
- Choose your Seat Type.
- Detailed — shows roles, accountabilities, and responsibilities.
- Condensed —does not show Roles & Responsibilities
- Click Print
Multiple Org Charts
This feature allows Owner, Admin, and Manager-level users to create additional draft Org Charts beyond your primary chart.

Creating a Brand New Chart
To create a new draft chart:
- Click Org Chart from the left navigation.
- Click the Drafts tab.
- Click Create New near the top right of the screen.
- Create a title.
- (Optional) Describe how this chart differs from the Primary Chart.
- (Optional) Share the draft with other users.
- Click Create on the bottom left of the Create New Chart pop-up.
Making a Copy of Your Primary Org Chart
To make a copy of your primary Org Chart as a draft:
- Click Org Chart.
- Click the ellipses on the far right of the screen.
- Click Duplicate as draft.
Editing Your Chart Drafts
To edit one of your draft charts:
- Click Org Chart.
- Click the Drafts tab.
- Click on the chart you wish to edit.
- Edit as normal.
Deleting Draft Charts
Only the creator of a draft Org Chart can delete it. If someone has shared a draft with you that needs to be deleted, contact that user.
To delete one of your draft charts:
- Click Org Chart.
- Select the Drafts tab.
- Click the ellipsis of the intended draft Org Chart.
- Select Delete from the dropdown.
- Click I understand… Delete Anyway to confirm.
For more on this tool, check out the following resources from the 90u Library.
