Custom Vision Feature
A simple guide to curate a Vision tool that works for you through the custom Vision feature.

Written by Tommy Mains
Updated at May 5th, 2025
-
 Insights
-
 Data
Data
-
 Rocks
Rocks
-
 To-Dos
-
 Issues
-
 Meetings
-
 Headlines
-
 Vision
-
 Org Chart
-
 1-on-1
-
 Directory
-
 Knowledge Portal
-
 Assessments
-
 Integrations
-
 Account Options and Troubleshooting
-
 Mobile
-
 Partner Hub
-
 Maz
Maz
Table of Contents
Customizing your team's or organization's Vision tool allows you to document all the features defining your organization now and where you want to be in the future. To enable the custom Vision feature, an owner or admin should navigate to Company Settings:
- Click your name at the bottom of the left navigation.
- Click Company Settings.
- Scroll down to the Vision section of the Configuration page.
- Toggle on Custom Vision.
The Custom Vision feature is available to all paid subscription tiers.
Video Overview
The video below provides a quick overview of the entire Vision tool. At 1:21, select the chapter "Editing the layout" to watch specific instructions on customizing your Vision tool.

How to Customize Your Team's Vision Tool

Each team leader can choose to customize their team's Vision tool by clicking the gear icon (![]() ) on the top right of the Vision tool's page and toggling on Custom Vision.
) on the top right of the Vision tool's page and toggling on Custom Vision.
Users with Manager or higher permissions can edit their team's Vision tool.
Customizing your Vision tool won't change how the generated PDF is organized when printing your Vision.
When this optional feature is turned on, managers, admins, and owners have an ![]() Edit Layout button on the Vision tool filters bar. If your organization has a coach, they can also edit the layout of any team's Vision tool.
Edit Layout button on the Vision tool filters bar. If your organization has a coach, they can also edit the layout of any team's Vision tool.

After clicking ![]() Edit Layout, you can:
Edit Layout, you can:
- Drag and drop sections on the Vision or Goals pages into a new order (for example, Core Values).
- Resize a section by clicking and dragging the diagonal arrow on the bottom right of the card.
To apply changes, click ![]() Save and Exit.
Save and Exit.
Customizing Vision and Goals Cards
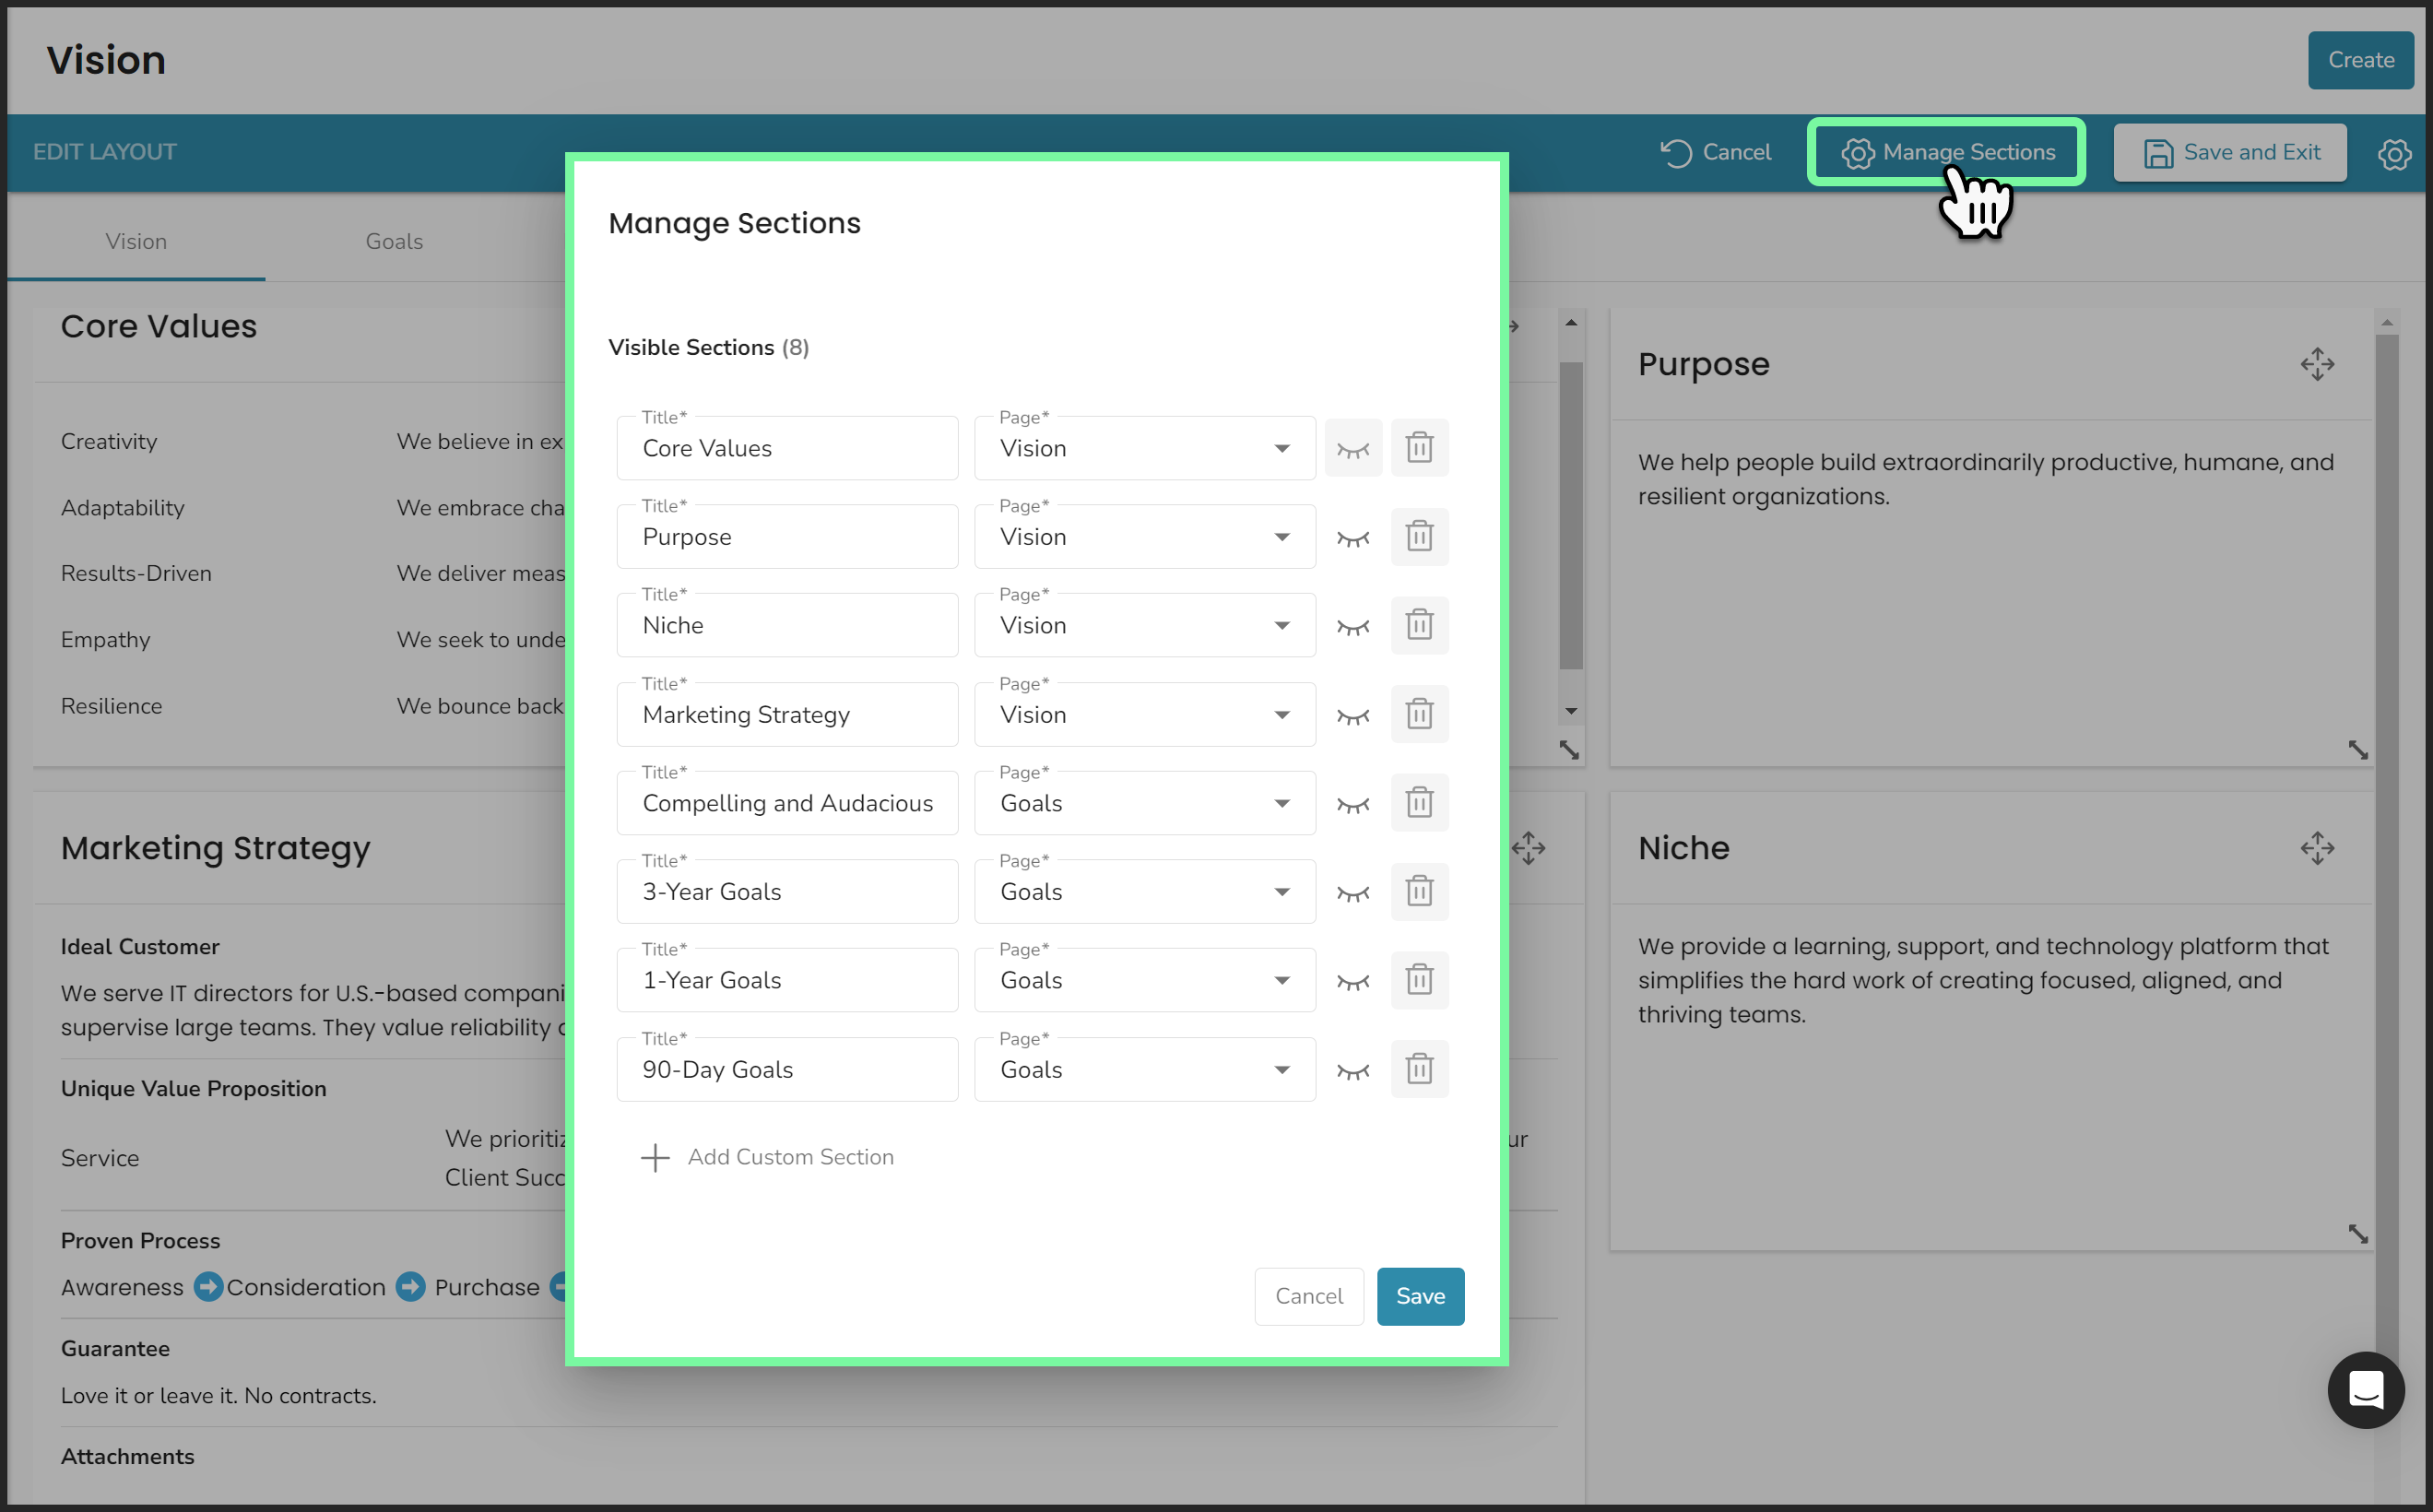
To edit existing cards on the Vision and Goals pages or create a new one, click Edit Layout > Manage Sections. Use the following popup menu to perform the following:
- Rename a card by writing a new title.
- Change which page a card is viewed on with the Page dropdown.
- Hide a card by clicking the eyelash icon.
- Delete a card by clicking the trashcan icon (you cannot delete default sections).
- Show a hidden section by clicking the eye icon.
- Create a new section by clicking Add Custom Section.
When finished, click Save on the popup and ![]() Save and Exit on the filters bar.
Save and Exit on the filters bar.
Creating a New Vision or Goals Section
To create a blank section in the Vision tool for either the Vision or Goal page:
- Click
 Edit Layout.
 - Click
 Manage Sections.
 - Click Add Custom Section at the bottom of the Visible Sections list.
- Write the title for this section in the textbox.
- Select Vision or Goals from the Page dropdown.
- Click Save.
- Click
 Save and Exit.
You can edit the new section's content by clicking the pencil icon (![]() ) at the top right of the card. You can also change its size and placement by clicking the
) at the top right of the card. You can also change its size and placement by clicking the ![]() Edit Layout button.
Edit Layout button.
For example, if your team has created an SMaC Recipe (a list of Specific, Methodical, and Consistent operating practices), you can add a custom section to your Vision page to document it.
Learn more about building a Vision for your organization and even how to create your own SMaC recipe in our free Vision Builders Workbook.