Mastery: The Concepts, Tools, and Disciplines behind Ninety
Explore the Mastery tool and what your company sees, including how to add, edit, remove, and rearrange the Resources available.

Written by Amanda Barfield
Updated at April 1st, 2024
-
 Insights
-
 Data
Data
-
 Rocks
Rocks
-
 To-Dos
-
 Issues
-
 Meetings
-
 Headlines
-
 Vision
-
 Org Chart
-
 1-on-1
-
 Process
-
 Directory
-
Knowledge Portal
-
 Mastery
-
 Assessments
-
Partner Hub
-
 Integrations and Beta
-
 Account Options and Troubleshooting
-
Mobile (Beta)
Table of Contents
Video Overview
Not sure exactly how to use the Mastery tool in Ninety? Watch the video below for a click-through of the options and use cases. For more detailed instructions, continue reading and following the steps in this article.
What Is Mastery, and When Is a CTD "Mastered"?
The Mastery tool (similar to the EOS Toolbox™ or Climbing Tools) includes tiles of different Resources centered around concepts, tools, and disciplines (CTDs) that are the building blocks of running a great company and using Ninety. Our team of business coaches, entrepreneurs, and experts handpicked the resources your team needs to succeed, and we are always adding more educational content.
Selecting Mastered applies at the team level, not for the company as a whole. A team decides when each CTD is mastered. This is up to the interpretation of the team and often a coach, but some common practices to decide when a team has Mastered a CTD are,
- The entire team understands the CTD (has read the resources available or learned from a coach)
- It is fully implemented by the team
- There are KPIs and processes tracking the success or failure of the CTD
- It has a process to be continually refined over time
What Your Company Sees
Every company in Ninety has a Business Operating System (BOS). You can learn more about BOSs, but for the purposes of Mastery, you should know each BOS has a default set of Resources available.
The default Resources you see in your account are based on your BOS or added by your coach. An Owner or Admin in the account has permission to add, edit, and rearrange the Resources that are visible to each team.
Note: While selecting Mastered only affects a single team, any edits made to the layout (including adding or editing tiles) reflect across the entire company.
By default, each tile includes,
- Icon and Title
- Description
- Learn More link
- Mastered checkbox
Note: Based on BOS, default setup, or how tiles have been edited, there may not be a link to Learn More, and tile appearance may vary.
Adding and Editing Resources
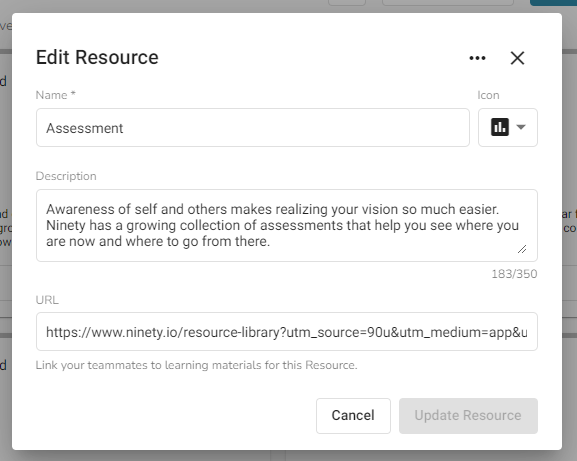
This functionality is available to Owner and Admin roles. Each Resource can be edited by selecting the three dots in the upper right of the tile and choosing Edit.
Users can edit the Icon, Title, Description, and Learn More link (including removing it).
To delete the Resource, use the same three dots and select Delete.
Use the New Resource button in the upper right of the page to create a new Resource. The same fields are available as when editing an existing Resource: Icon, Title, Description, and Learn More link.

Edit the Layout
To edit the way Resources are shown on the Mastery page, click Edit Layout in the upper right corner of the page.
Once selected, drag and drop the tiles using the move icon (four arrows) in the upper right of each tile. Click Save Layout to save changes.
Note: This is a company-wide layout, meaning changes will affect all teams in the account.
View and Discuss Mastery in Meetings
While the Mastery tool is available in the sidebar, it can also be added to the Meetings tool. By default, it is in the Quarterly Planning Meeting agenda.