Creating Issues
How to add Issues to your short- and long-term lists using the Create button, from the Issues tool, or by creating a linked Issue.

Written by Tommy Mains
Updated at April 30th, 2025
-
 Insights
-
 Data
Data
-
 Rocks
Rocks
-
 To-Dos
-
 Issues
-
 Meetings
-
 Headlines
-
 Vision
-
 Org Chart
-
 1-on-1
-
 Directory
-
 Knowledge Portal
-
 Assessments
-
 Integrations
-
 Account Options and Troubleshooting
-
 Mobile
-
 Partner Hub
-
 Maz
Maz
Table of Contents
Issues are the problems, obstacles, ideas, or opportunities teams discuss and solve during meetings. Our Issues tool captures and stores your team's short- and long-term Issues.
- Short-term Issues are discussed and solved during weekly team meetings.
- Long-term Issues are prioritized, discussed, and solved during quarterly and annual team meetings.
Tip: Use our ![]() Insights tool to track your team's Issue completion rate and more.
Insights tool to track your team's Issue completion rate and more.
Video Overview
Creating Issues in Ninety
There are three ways to create a new Issue in Ninety:
- Using the global Create button
- From your team's page in the Issues tool
- As a Linked Issue from another item
Using the Create Button
You can create new Issues from anywhere in Ninety using the Create button on the top right of the page or in the Issues tool.
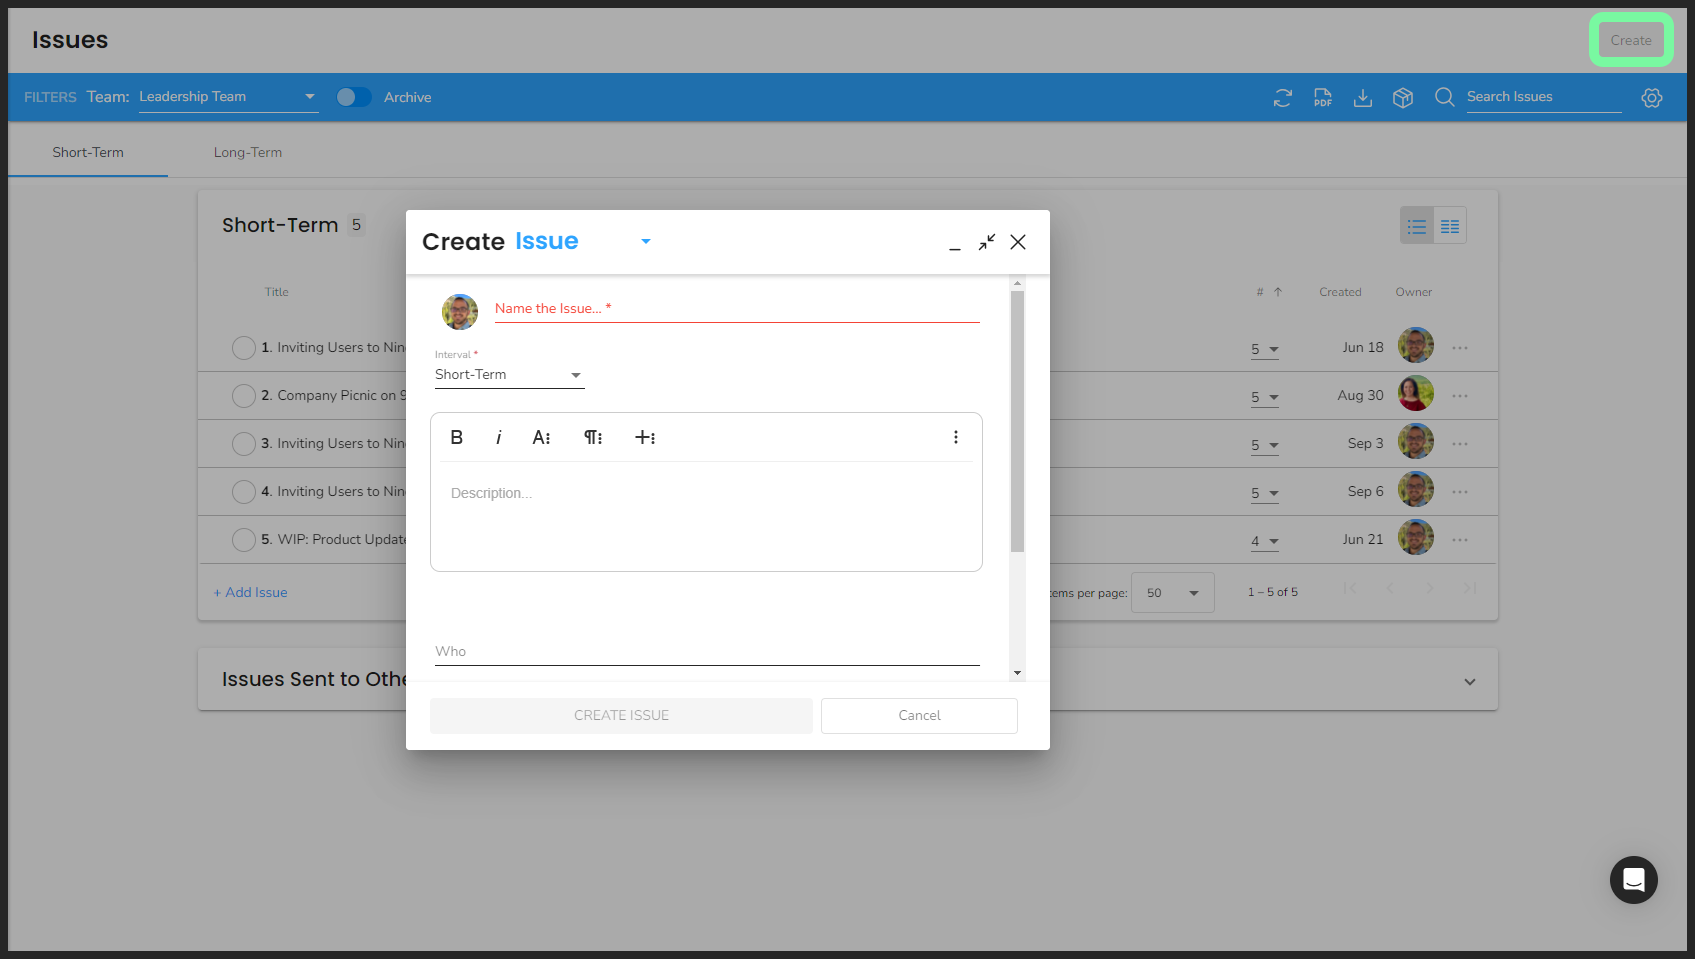
To create a new Issue with the Create button:
- Click Create on the top right of any page.
- Use the dropdown to ensure Issue is selected.
- Write a title for the Issue.
- Choose a team from the Team dropdown.
- Click Create Issue.
While creating Issues, you can also:
- Switch the person bringing the Issue to the team by clicking the profile image and selecting another user.
- Make it a long-term Issue by clicking the Interval dropdown and selecting Long-Term.
- Write a description.
- Add a user to the Who section — this is the decision maker for the Issue.
- Give it a priority number from the Priority dropdown.
- Attach files by clicking the plus button next to Attachments.
Creating in the Issues Tool
To create a new Issue from your team's page in the Issues tool:
- Click Issues from the left navigation.
- Select the Short-Term or Long-Term tab.
- Click + Add Issue at the bottom of the Issues list.
- Write the Issue's title and press Enter or click the checkmark.
- Click on the Issue's row to open its details panel to edit its content.
- Use the details panel to:
- Assign the user who is raising the Issue
- Edit the title
- Add a description
- Apply a priority number
- Add a user to the Who section — this is the decision maker for the Issue
- Choose which team should discuss the Issue with the Team dropdown
- Send the Issue to another team to discuss by clicking the paper airplane icon and selecting a team
- Add attachments and comments
Creating Linked Issues
Linked Issues show the item(s) it's linked to in the Linked Items section of its details card.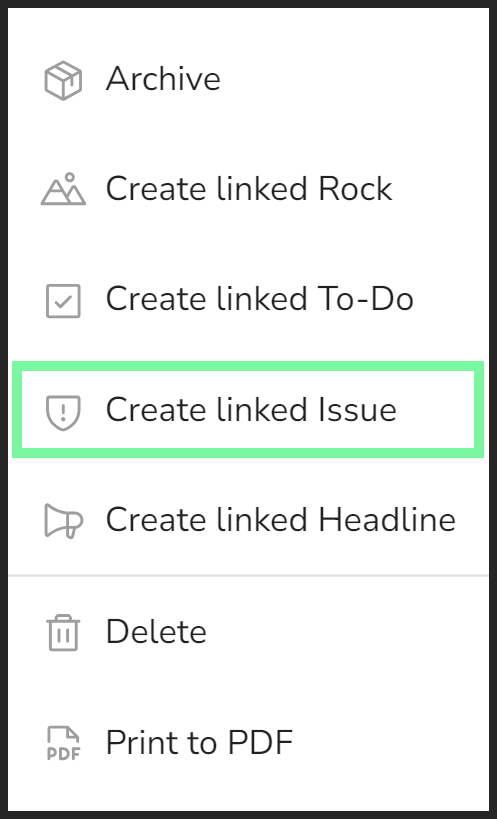
You can create a linked Issue from an existing item in Ninety (such as a Rock, To-Do, Issue, or Headline) during a meeting or by navigating to the corresponding tool from the left navigation.
To link an existing item to a new Issue:
- Right-click the item's row.
- Click Create Linked Issue from the dropdown.
- Edit details as desired from the popup.
- Click the Create Linked Issue button.
To unlink an item from an Issue, the user assigned to the Rock should:
- Click Issues from the left navigation.
- Click the Issue to open its details panel.
- Scroll down to the Linked Items section and click Edit.
- Click Unlink.
Tip: Enter Your Issues Before Your Next Meeting
Entering Issues before your next meeting is crucial for several reasons:
- Improved meeting flow: Adding well-described Issues beforehand keeps the meeting running smoothly.
- Efficient prioritization: Preliminary ranking helps streamline the discussion process.
- Enhanced clarity: Accurately identifying and thoroughly clarifying Issues increases the chances of resolution.
- Focused discussions: Well-prepared Issues reduce the likelihood of conversations veering off path.
- Time-saving: Capturing Issues as they arise throughout the week saves valuable meeting time.
By entering Issues beforehand, your meetings will be more focused, productive, and aligned with their intended purpose.
Managing Your Issues Lists
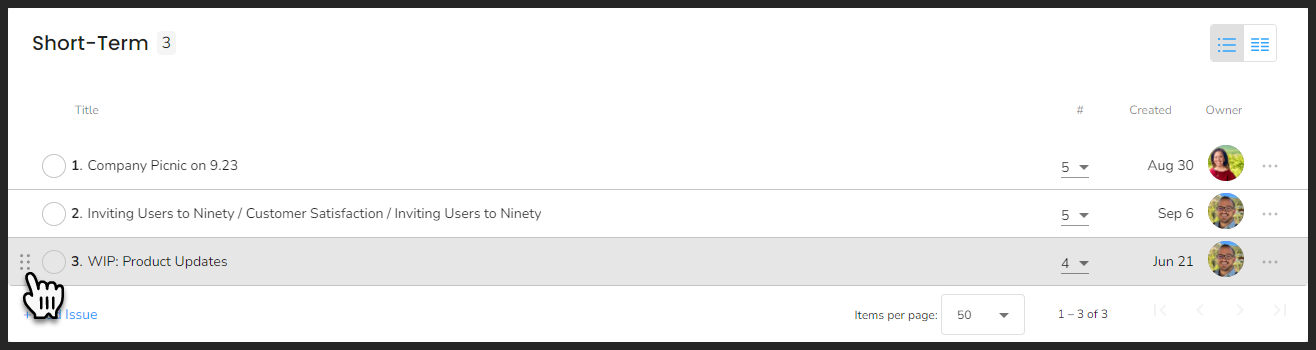
Keeping your Issues lists up-to-date and organized helps teams stay productive both in and out of meetings. You can do the following to quickly manage your Issues lists:
- Toggle between list and column view with the buttons on the top right of the list.
- Drag and drop Issues into a new order by hovering over the far left of an Issue's row and then clicking and dragging the six-dot icon.
-
Sort all issues alphabetically, numerically (by priority number), chronologically (by created date), or individually (by Issue owner) by clicking any of the following at the top of each column, respectively:
- Title
- #
- Created
- Owner
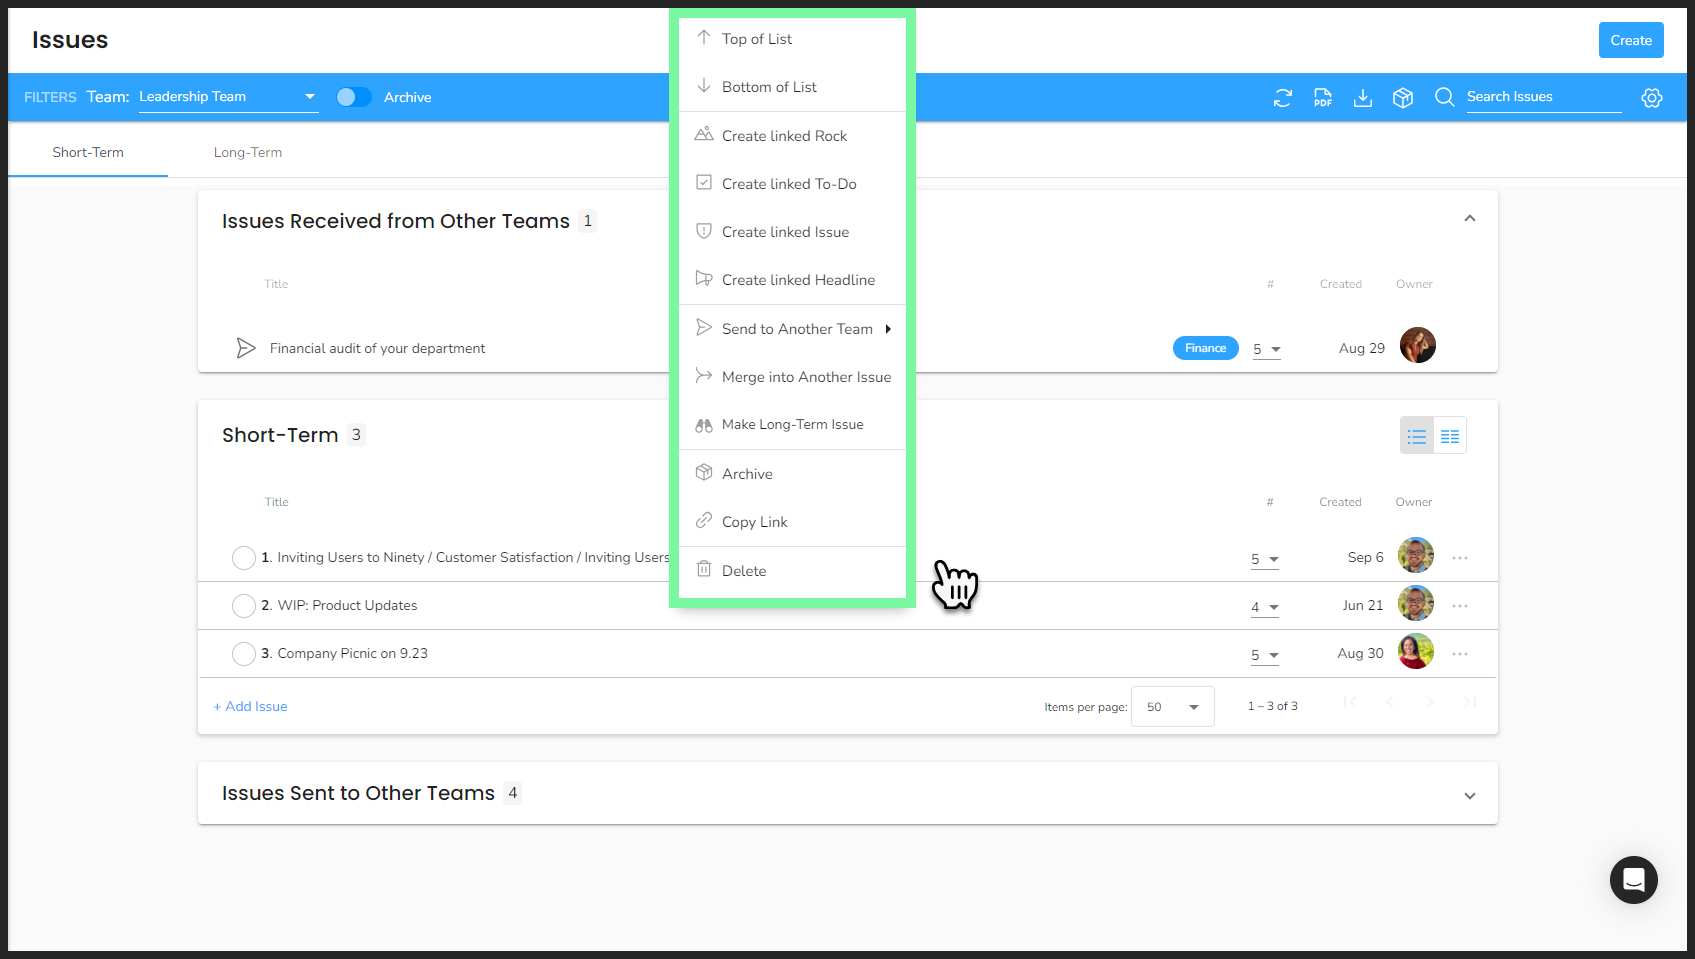
Right-click any Issue on one of your team's lists to open a dropdown of additional ways to manage your Issues, including:
- Top of List — Move this Issue to the top of the team's list.
- Bottom of List — Move this Issue to the bottom of the team's list.
- Create linked Rock — Create a Rock using this Issue's title and description.
- Create linked To-Do — Create a To-Do using this Issue's title and description.
- Create linked Issue — Create a new Issue using this Issue's title and description.
- Create linked Headline — Create a Headline using this Issue's title and description.
- Send to Another Team — Move this Issue to another team's list.
- Merge into Another Issue — Transfer all of this Issue's information to another Issue on the list (the user will click the Issue to merge with).
- Make Long-Term Issue/Make Short-Term Issue — Move this Issue to the same team's opposite list.
- Archive — Move this Issue to your team's Issue archive.
- Copy Link — Copy a link directly to this Issue's details card to your clipboard.
- Delete — Delete this Issue from your list (it will not be archived).